The Viewer allows you to find and highlight individual loops in your cave surveys. It also allows you to highlight and color surveys according to the quality of each loop.
To activate the option, select the "Tools -> View Loops..." option from the menu bar. |
|
This will display the "Loop Finder" dialog box. The dialog is divided into several sections. Here is a detailed description of each section:
|
|
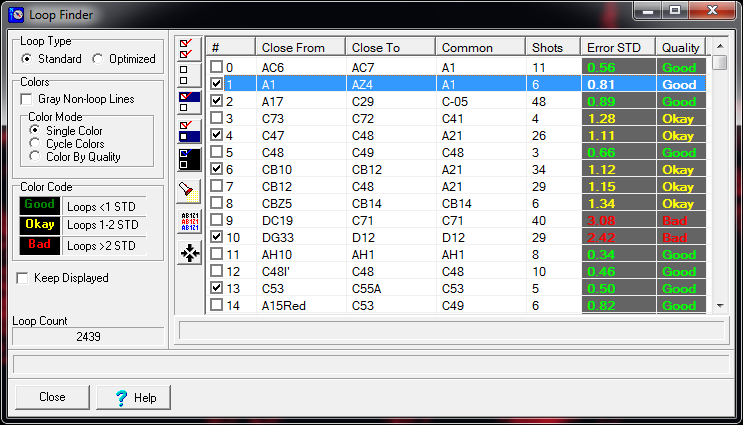
Standard and Optimized loops can be very different. Standard Loops will show loops that are caused by the use of Fixed Stations, Optimized Loops will not. If shots have been excluded plotting that are a part of a loop, the Standard Loop option will show a broken loop that doesn't close. Optimized loops won't show the loop at all.
2. Loop List. The Loop List display all the loops that were found in the cave.
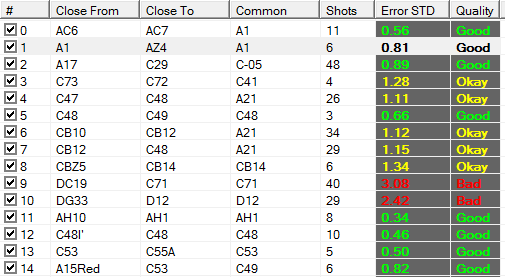
Each row displays information about a specific loop. The check box to left of the row enabled the loop for highlighting. Each row also displays the Number of shots in the loop, the Common or starting station for the loop and two stations that close the loop..The list also displays the error standard deviation for the loop. This is the actual loop error divided by the expected standard deviation for the loop.
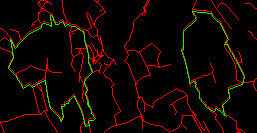
3. Loop Colors. When you select one or more loops from the from list, the program highlights each loop in color so the loop can be seen.
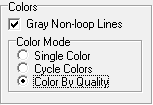
You have the option of coloring the selected loops in several ways:
Gray Non-Loop Lines. This option colors all non-selected or non-loop shots gray. This makes it easier to see the loops.
Single Color Mode. In this mode, the program displays the loops the same color.
Cycle Colors Mode. In this mode, loops are colored with alternative colors so the two adjacent loops are easier to differentiate.
Color By Quality. In this mode, loops are colored according to their quality. Good loops are colored green. Okay loops are colored yellow and bad loops are colored red.
4 Keep Displayed Checkbox. If this option is enable, the loops will continue to be displayed after the you have closed the Loop Finder.
![]()
5. Tool Bar. The Tool Bar to the left of the loop list contains buttons that allow you to quickly select and de-selects specific loops.Among other things the tools allow you to set large blocks of loops using the highlight.
Highlighting. A Loop can be highlighted by clicking on it. You can highlight a range of items by clicking on item and then holding down the Shift and clicking on another item. This will highlight all the intervening items.
You can also hold down the Control Key and high light individual items by clicking on them. As long as the Control Key down, all the previously highlighted items will remain highlighted.
Here is a list description of each tool: |
|
Check All Button. Clicking this button checks all loops and sections in the list. |
|
Clear All Button. Pressing this button clears all loops and sections in the list.
|
|
Check Highlight Button. Pressing this button causes all the highlighted items to become checked.
|
|
Clear Highlight Button. Pressing this button causes all the highlighted items to become cleared.
|
|
Toggle Highlight Button. Pressing this button causes all the highlighted items to change to the opposite state. If a highlighted box was checked it will be cleared and vice versa. |
|
Search Button. Pressing the button brings up a search dialog that allows you to search for any stations in the loops. This is useful with caves where there may be hundreds of surveys. Be aware that a single station may be used in several loops. You can re-press the "Find" button to find additional loops with that contain the target station. |
|
Loop Shots Button. Pressing this button displays a list of all the shots in the currently highlighted loop. |
|