The Viewer has several stereo-viewing modes and options that control the way 3D viewing works. You can controls these options by selecting the "Preferences->Set Stereo Mode" option from the menu bar. The program will present you with the Set Stereo View window.
Here is a detailed description of the options:
1. Stereo Mode. The Viewer has three different stereo viewing modes. Here is a detailed description of each one:
2. Image Color. These options only apply to Two-Color-Mode. They allow you to select the color that is used to draw the image for each eye. Normally, this would be red and blue to match the colors of the lens, but sometimes red and green glasses can be used. (Note that if you are running your video card in 16 or 256-color mode, some colors may not well work and can detract from the stereo effect. This is due to the effect of dithered colors.) |
|
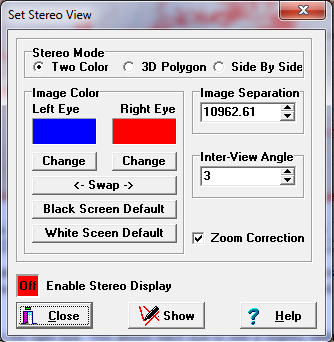
Background Colors. There are two default color options, one for black background screens and one for white background screens. The colors for black backgrounds are red and blue and the colors for white background are red and aqua. The white background colors are also useful for printing stereo images. (Note: the white background colors can be used with the black background screen and the produce a bright white stereo line. However, there can be more color bleed-through and the stereo effect may be harder to see.)
3. Image Separation. This option only applies to the Side-By-Side mode. The option specifies the separation between the two images of the cave. Larger numbers mean the images are further apart, smaller numbers mean the images are closer together. Normally, you would adjust these values so that when the images are printed, they are spaced at a distance similar to the spacing of your eyes.
4. Inter-View Angle. The Viewer produces a stereo view by slightly rotating the image from the left eye to the right eye. This allows each eye to see a slightly different view of the object. The Inter-View Angle option allows you to set the value of this rotation. The larger the rotation, the more three dimensional the cave appears. However, if the angle is too large, your eyes will have a difficult time focusing on the image.
5. Zoom Correction. Zooming in on an image magnifies the differences between the two images. This causes the three dimensional effect to increase as you zoom in. If you zoom far enough, the differences between the two images may become so large that it is difficult to focus your eyes on the image. The "Zoom Correction" option compensates for this problem by reducing the Inter-View angle as you zoom in. This allows the program to maintain a constant 3D effect. Turning off the "Zoom Correction" option allow you to manually control the exact 3D effect, but you have to adjust it every time you zoom in or out.