The scale tool allows the sketch image to be scaled to any size. In addition, it has specialized tools for setting the precise resolution of the image. This allows you standardize all the images in a survey to the same scale. Here is a description of all the options in the Scale Tool.
Image Size Box. The image size box displays the size of the image. You can change the size of the image by changing the values in the "Pixel" box to the right. Increasing the pixel value increases the size of the image. Decreasing the pixel value, decreases the size of the image. During this process, the aspect ratio of the image is kept constant so the relative size of the width to height is always the same no matter the image size.
The "Increment" setting controls how fast the Pixel value changes. Increasing the value makes changing the size quicker. Smaller increments allow you to more precisely set the value.
Resize Button. When you are happy with the size you have selected, you press the Resize Button and the program will scale the image to match your size specifications.
Sharpness. The scaling operation uses a technique called "over sampling" to ensure a smooth result when the image is resized. The sharpness option controls how smooth the image will be. If the Sharpness is set to "Sharp", the edges of lines will be clean and well defined, but there may be artifacts and anomalies on some images. Conversely, if the Sharpness is set to "Soft", edges of lines will be less distinct but there will be fewer anomalies. |
|
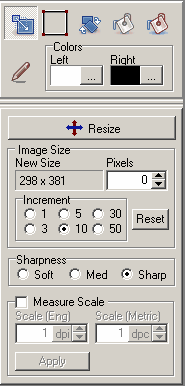
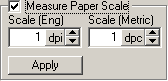
Measure Scale. This option allows you to set the image's resolution through the scaling process. In other words, it sets the number of dot/inch or dots/centimeter in the image. This is useful for standardizing your images to a consistent scale for merging and, ultimately tracing.
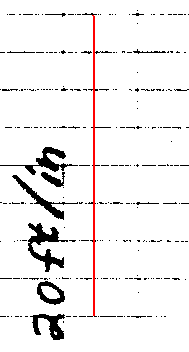
Before you can use the tool to measure the scale of your image, the image must be marked in some way to identify an inch or a centimeter. This can be a set of marks on the paper or grid lines, but it must be visible in the image. To be clear, this is Paper-Scale; we are defining the number of pixel per unit of paper, not the Cave-Scale, which we will handle later.)
When the Measure-Scale option is enabled, you can draw a line on the image by clicking and dragging the mouse. The program will measure the length of the line in pixels, If you draw the line so it is an inch long on paper, the resulting measurement will tell you the number of pixels per inch.
For example, in the image to the right, horizontal grid lines are spaced 1/8 inch apart. The red line covers 8 grid lines, so it is one inch long on paper. The line measures 300 pixels, so the image was scanned at 300 pixels per inch. |
|
Once you have measured the number of pixels along an inch or centimeter in the image, you should change the Scale value in the Measure Paper box to the value you want. Finally, you should press the Apply button. The program will calculate the required amount of increase or decrease in the image size necessary to achieve the desired scaling. The required adjustment will be placed in the Pixel value in the Image Size box above. At this point, you can press the Resize Button and the image be scaled to match the new resolution or Paper-Scale. |
|