VI. Final Morph. In the final morph, we adjust the whole combined sketch-map so all the stations on the sketch match those in the line plot. Since we have already done a preliminary morph, the final adjustments will be relatively small.
A. Morphing The Combined Image. The process of doing the final morph is identical to the preliminary morph except that you are working with the combined sketch and all the shots for the whole survey. Just follow the steps in Step III. In this case, you will be working with many more stations and you may be able to enable whole surveys at once instead of just a few shots.
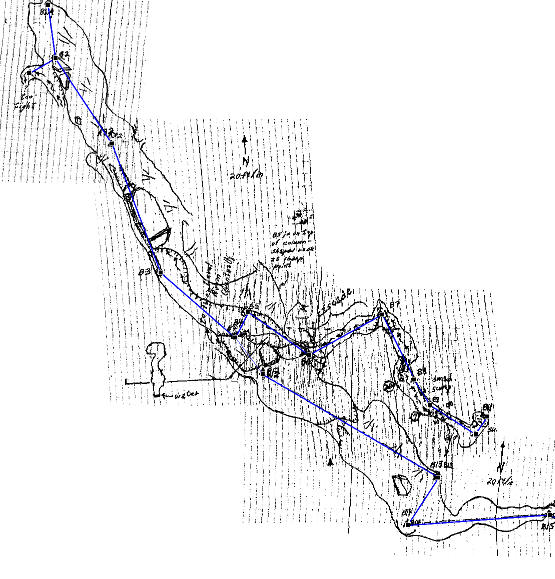
The image below shows the final morph of a portion of the Fulford B-survey. You can see by the residual grid lines how each individual image has been morphed to make it align with the survey shots.
|
B. Final Steps. When you have completed the final morph you should clean up the extraneous lines, marks, and any details that you won't need for tracing. You can do this using the Edit Tools described in step III. F. Once you are satisfied with the combined image, exit the Morph Tool by hitting the OK button and then save the image using the "Save" button.
C. Tracing and Printing. If you are tracing the image in a digital editor such as Inkscape or Illustrator, you would now load the image into that program. If you are hand-drawing your cave map, you can print the combined image to paper or a transparency and work from that. At this point, there are no print routines in the Compass sketch-map Editor, but you can load the image into Microsoft Paint (or other bitmap editor) and use it to print the image. I may add print capability later on.
|