Overview. The morphing process uses data from a plot file to determine the correct position of stations on the sketch-map. The Survey Tree allows you to choose which shots are displayed and which shots are used in the morphing process.
Loading Plot File. Before a Survey Tree can be displayed, a plot file must be loaded into the program. You can load a plot file by selecting the "File -> Open Plot File" option from the menu bar. If you have opened a plot file in the past, the program keeps track of the last five files. You can quickly reopen anyone of these files by selecting the "File -> Reopen" option from the menu bar. |
|
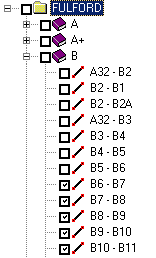
Once you have opened a plot file, all the Sections, Surveys and Shots are displayed in the Survey Tree. The survey tree, has a hierarchical tree-structure similar to to the folders displayed used in Windows Explorer. In other words, it shows how your surveys are organized
The Tree can be collapsed so only the top-most Sections are shown. The tree can also be expanded so that all the Shots, Surveys and Sections are shown. The small [+] and [-] signs next to the items indicate whether the item has been expanded or collapsed. Clicking the [+] or [-] signs will expand or collapse that part of the tree.
|
|
Check Boxes. To the left of each item is a small box. Clicking on the box sets or clears a check mark. Items that checked, are displayed and items that aren't checked are not. Since the tree is hierarchical, checking a section or a survey will display all the items underneath, even if none of the sub-items are checked. This allows you to display or hide large sections of the cave quickly.
|
|
Selection Tools. Along the left edge of the tree is a tool bar. These buttons facilitate the checking or un-checking large groups of Sections, Surveys and Shots. Here is a description of all those tools |
|
1. Set All, Clear All. The Set All button unconditionally sets all the check boxes in tree. Likewise, The Clear All button clears all check boxes in the tree.
|
|
Selecting Items. The next few options work by selecting or highlighting items. Here is description of the highlighting process.
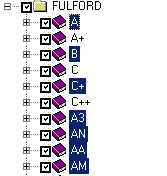
You can quickly select/highlight groups of items using the mouse and the keyboard. For example, if you hold down the Shift Key and then click in two places on the tree, all the intervening items will be highlighted.. Likewise, holding down the Control Key and clicking on individual items will select those items one at a time.
In the image to the right, the bottom four items were selected with the Shift Key and item A, B and C+ were selected with the Control Key. |
|
2. Set/Clear All Selected. The Set All Selected button sets all items that have been highlighted. The Clear All Selected button clears all the items have selected.
|
|
3. Toggle Selected. This button toggles all the items that are selected. If an item is unchecked, it will be checked and vice versa.
4. Search. The Search button allows you to search through all the Sections, Surveys and Shots to find a specific item. This can be very useful in large surveys. |
|