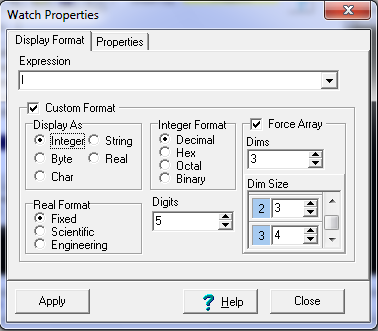
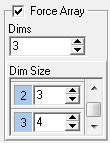
You can display the Watch Properties Dialog by pressing the Watch Properties button in the Watches page of the Debugger. The Watch Properties Dialog lets you set various aspects of the way a Watch Variable is displayed. It also displays the underlying details of a variable. The Watch Properties Dialog is divided into two pages:
I. Page I: Display Format |
||||||
|
||||||
2. Custom Format Options. The variable's value will be displayed in the Watch List using its declared data type. It is sometimes useful to display it in a different format. Enabling the Custom Format option lets you choose exactly how the variable is displayed. Here are the custom options:
A. Display As. This option lets you override the declared format and force the variable to be displayed in a different format. For example, you may have created a real array that actually contains integers. Selecting the Integer option would force the debugger to display the current value as an integer. Here is a description of each option:
Integer. If this option is selected, the variable will be displayed as an integer no matter what the actual data type is. This is useful for doing things like examining the address where a real is stored.
Byte. If this option is selected, the variable is displayed as a byte, no matter what the actual data type is.
Char. If this option is selected, the variable is displayed as an ASCII character, no matter what the actual data type is.
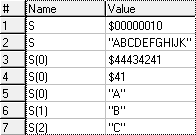
String. If the String data type is selected, the variable will be displayed as a string no matter what the actual data type is. This includes reals, which could hold an integer, a pointer to a string or a real, depending on how they are used. It does not include one-dimensional "char" or "address" variables that can only hold single-byte values. One byte values are too small to hold a string pointer so they would never be used to hold a string. It does include two-dimensional "char" or "address" variables because the first dimension can hold a pointer to a string and the second dimension can be used to dereference the pointer.
Real. If this option is selected, the variable will be displayed as a real no matter what the actual data type is. This is useful for instances where reals may be stored in complex data types.
B. Real Format. If the variable being watched is a real number, the value can be displayed in Fixed Point, Scientific and Engineering notation.
C. Digits. The Digits display controls how many digits past the decimal point are displayed for floating point numbers. For hex numbers, it controls the total number of hex nibbles displayed. If the hex number is bigger than the number of digits specified, the number of digits necessary to show the full number will be displayed.
3. Integer Display Format. The Integer Display Format options (lower left) control the display of any integer numbers. Integers can be displayed in decimal, hexadecimal, octal and binary formats.
|
||||||
II. Page II. Watch Variable Properties |
||||||
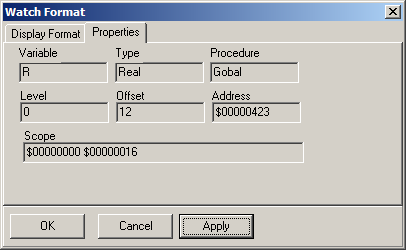
This page displays all relevant properties of the Watch variables.
Variable. This is the name of the variable as used in the source code.
Type. This is the data type of the variable, which in XPL is generally confined to integer, real, char and segment variables.
Procedure. This is the name of the procedure where the variable was defined.
Level and Offset. Each level of subroutine nesting has its own set of local variables. The Level value specifies the nesting depth of the variable. The Offset value specifies how far the variable is from the beginning of the local variable store.
Scope. This specifies the range of I2L Program Counter values in which the variable is visible.
|
|
|||||


