The Color-By-Depth option and the Exclude-By-Depth options normally work with horizontal planes. Caves, on the other hand, are often tilted. The Tilt option allows you to tilt the color and clipping planes to match the tilt of the cave. This enables you to color specific layers in caves that have tilted stratigraphy. It also allows you to exclude specific parts of a tilted cave.
Specifying Tilts. You can specify the tilt of the cave in three ways:
1. Azimuth and Inclination. This method allows you to set the tilt based on the direction and slope of the cave. For example, if the cave tilts downward at a 45 degree angle to the east, you would enter 90 degrees for the azimuth and -45 degrees for the inclination. This is the same way a geologist would specify the "Dip" of a rock formation. To set the tilt this way, simply enter the azimuth (compass direction) and inclination in the two edit boxes.
2. Visually. You can also set the tilt visually by dragging the "Compass" in the Tilt Rotations box. To do this, simply drag the "arms" of the "Compass" into position. The azimuth and inclination of the compass always face you. For example, if the cave tilts downward at a 45 degree angle to the east, you would drag the arm labeled "E" toward you and then downward. |
|
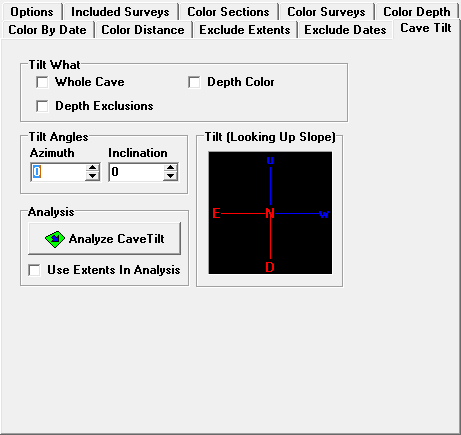
3. Analysis. With this method, the program analyzes the cave mathematically and calculates the direction and tilt of the cave. Pressing the “Analyze Cave Tilt” button initiates the analysis and displays the result in the Azimuth and Inclination boxes. The mathematical analysis works very well for caves that have a consistent dip in a particular direction. Caves that don't have a clear tilt to them and caves that are small or single passage caves that run in a straight line can't be analyzed accurately.
Using Extents In Analysis. Enabling this option causes the analysis to focus on the area of the cave defined by the extents. This enables you to zero in on certain parts of the cave that are more representative of the overall inclination of the cave. This option uses all six clipping planes that are defined in the extents section no matter how any other Complex options have been set.
Note: Be aware that as you zero in on smaller parts of a cave, it is hard to accurately analyze the tilt. It is also hard to analyze single, straight-line passages.
Applying The Tilt. Once you have specified the tilt, you can selectively apply it to the whole cave, the Color-By-Depth and the Depth Exclusion option. You do this by setting the appropriate checkbox in the "Tilt What" box.
Tilting The Depth Color. Selecting this option causes the color bands in the Color-By-Depth option to tilt. This allows you to color the cave so that the color bands are tilted to match the cave. Once you have set the tilt angle and turned on this option, you can adjust the colored bands in the Color-By-Depth page.
Tilted Color Thickness. When you tilt the color in this way, the thickness of the cave may change relative to the color bar. For this reason, the Viewer automatically adjusts the colored bands to match the newly tilted color pattern. As a result, you may notice that a color band’s top, bottom and thicknesses have changed to match the tilt.
Tilting Depth Exclusions. Selecting this option causes the top and bottom exclusion planes to tilt. This allows you to exclude parts of the cave along the specified tilt. Once you have set the tilt angle and turned on this option, you can adjust what parts of the cave are excluded in the "Exclude Extents" page. When this option is turned on, the image of the cave is tilted in the Exclude Extents page. This makes it easy to tell exactly what parts of the cave will be clipped off.