In many instances, you will be creating successive versions of the same map. You will usually want each successive plot to appear at exactly the same location on the paper. You could do this by duplicating the same pans, zoom and rotate values. However, if the any new surveys have been added to the cave, the pan, zoom and rotate values will no longer be valid. The Tie-In option allows you to place the cave in the same place on the page, no matter how the cave has changed.
Tying Plot To Paper. The Tie-In option works by tying a particular survey station to a particular place on the printed page. In other words, you can set the exact location of where a survey station appears on the page, regardless of the scale, rotation or view angle of the plot.
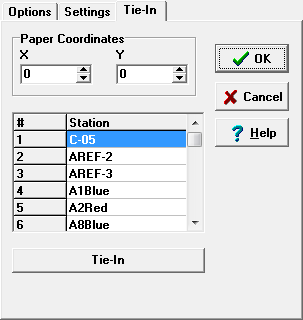
Specifying A Location. In order to tie a station to a location on the paper, you must specify the location and the survey station that will be tied to the location. You specify the location by entering the X and Y coordinate in the two edit boxes at the top of the page. The location is measured from the lower left corner of the page and is specified in inches or millimeters depending the units setting.
Specifying The Station. The station is specified by clicking-on a particular station in the survey list. Once you have selected a location and a station, just click-on the "Tie-In" button and the position of the cave will shift so that the specified station is located at the specified coordinates. There is also a "Tie-In" button in the Print Preview window so you can always re-establish the tie-in even after you have adjusted the plot. |
|