|
Building a Terrain Model
|
|
Step 1. Loading A DEM File and Selecting A Working Area. |
|
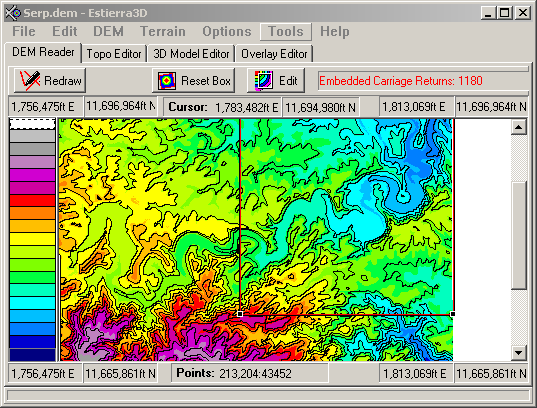
You begin by loading a DEM file into Estierra. When you do, Estierra
will display a color-coded map of the DEM file: |
|
 |
|
This is your index map which allows
you to pick and choose which parts of terrain you want to model. You have
many choices of colors and display modes that help you find terrain features
and landmarks in the data. Here we have 7.5 minute quadrangle of terrain
around Carlsbad Caverns in New Mexico.
Once the map is displayed you can use the mouse to select a portion of the
map for terrain modeling. As you can see, the position of the mouse and the
corners of the map are displayed in UTM or Long/Latitude coordinates. The
box on the map shows the section of terrain we will be working with.
|
|
Step 2. Detailed Topographic Editing. |
|
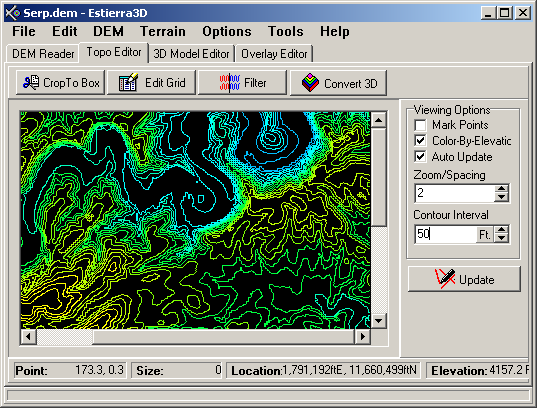
Once you have selected your working area, the program switches to the Topo
Editor. This tool displays a topographic map of the terrain you have selected.
The Topo Editor gives you much more resolution and detail, and allows to
make final editing cuts on on the data.
|
|
 |
|
Step 3. Displaying the 3D Model.
|
|
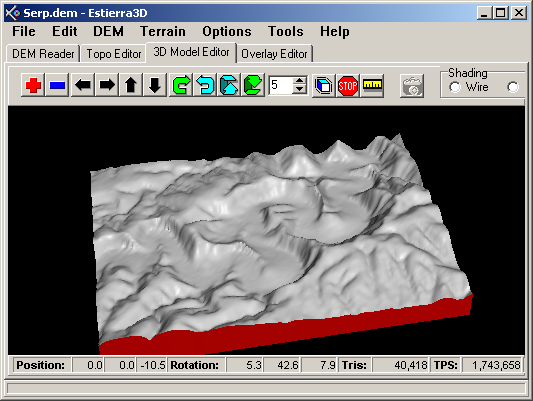
Once you made your final selection, the terrain
can be rendered as 3D surface. Here you have the 3D image display. You can
move, spin and zoom it using the mouse. You can also fly over the terrain
using the a joystick.
|
|
 |
|
All the tools around the edge, help you manipulate and edit the terrain model.
Along the top are tool buttons that allow you to do precision zooms,
pans and rotations. On the left, is a diagram of all the elements in the
scene. This allows you to set colors, textures, and materials.
|
|
4. Overlaying the Terrain
|
|
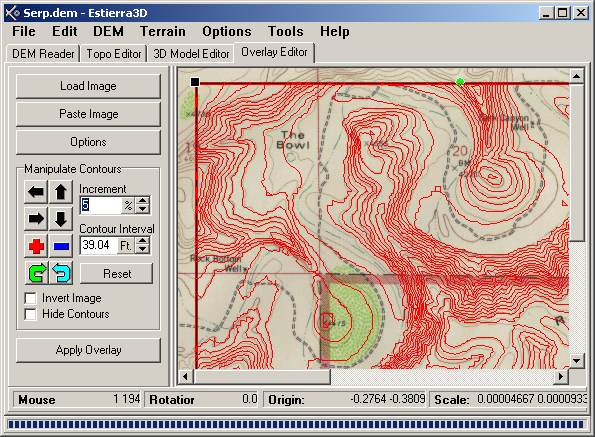
The final step in creating a terrain model is to overlay it with an aerial
photograph, topomap or geological map. Here is an image of the Overlay Editor.
|
|
 |
|
On the right you see an image of a standard USGS topographic map of the Carlsbad
Caverns area. Superimposed on the topomap is a set of contour lines from
the terrain model. All you have to do is align the terrain topo lines with
those on the map. Since most DEM files, topo maps, and aerial photographs
have distortions and errors in them, the ability to manually align the terrain
with the overlaid image is essential.
|
|
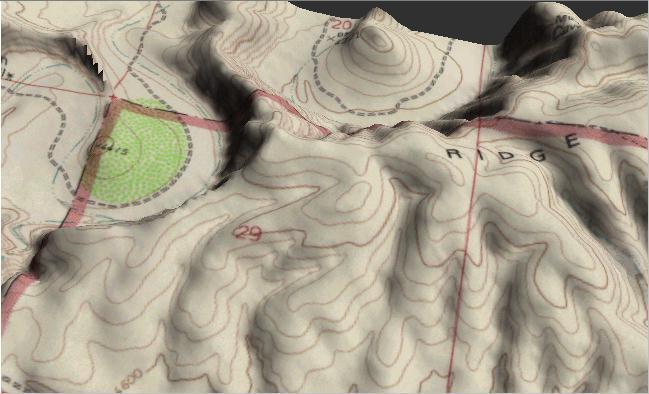
Step 5. Final Result. |
|
Once that is done, it just takes a push of a button to overlay the topographic map
on the terrain. Here is the final result: |
|
 |
|
This image shows the ridge line overlooking the Serpentine Bends, a meandering
canyon near Carlsbad Caverns in New Mexico. You can now fly over the terrain
in real-time, flying down the canyons as if you were in an airplane.
Click here for information about real-time
manipulations of terrain models. |


