|
Setting Up Inputs.
The following
section gives detailed instructions for setting up inputs for Vista or Windows-7
inputs:
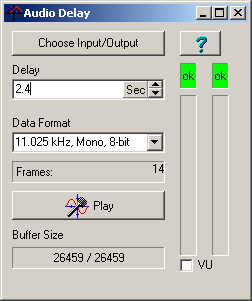
1. Press the "Choose Input/Output" button in the Audio Delay program.
2. This will take you to the "Sound" dialog. Select the "Recording" tab at
the top of the window.
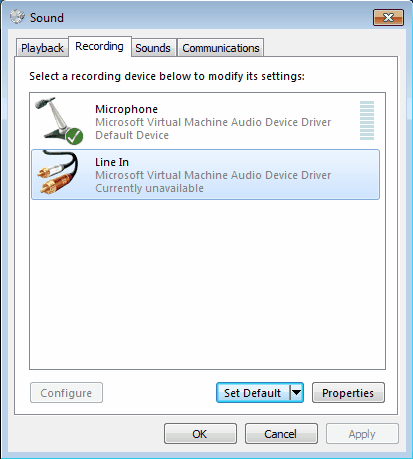
Select the "Line In" option. Next, press the "Default" button. This will
cause a check mark to appear indicating that the option has been selected.
3. Press the "Properties" button. This will display the "Line In Properties"
dialog. Select the "General" page.
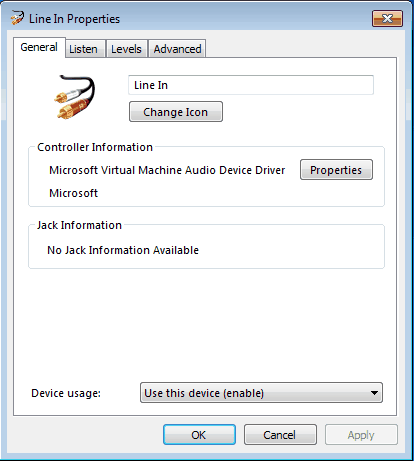
Make sure the "Device Usage" option at the bottom of the page is set for "Use
this device (enable)."
4. Now choose the "Listen" page.
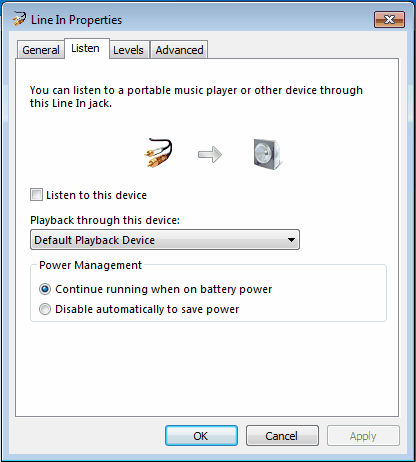
Make sure the "Listen to this device" option is not enabled, otherwise there
will be an echo in the playback.
5. Switch to the Levels page.
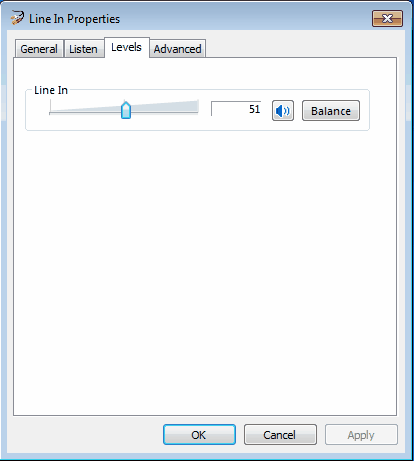
Adjust the levels to about 50%. If necessary, you can return to this dialog
and adjust them later.
When you have completed all the steps, press OK twice to exit back to the
Audio Delay program.
| 
