|
Setting Up Output.
The following section gives detailed instructions for setting up an output for
Windows outputs:
1. Press the "Choose Input/Output" button in the Audio Delay program.
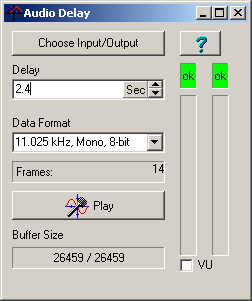
2. This will take you to the "Sound" dialog. Choose the "Playback" page from
the tabs along the top.
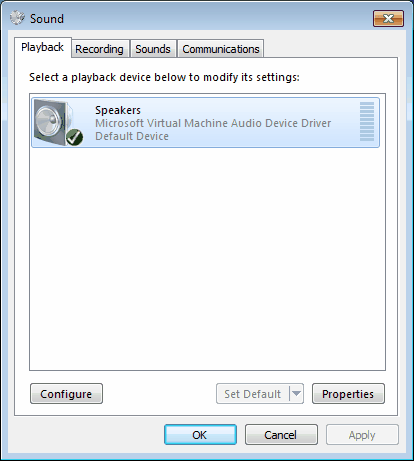
Make sure the Speakers options is selected and press the "Set Default"
button. This will place a green check mark next to the speaker icon.
3. Press the Properties Button. This will bring up the Speakers Properties
dialog. Select the "General Tab."
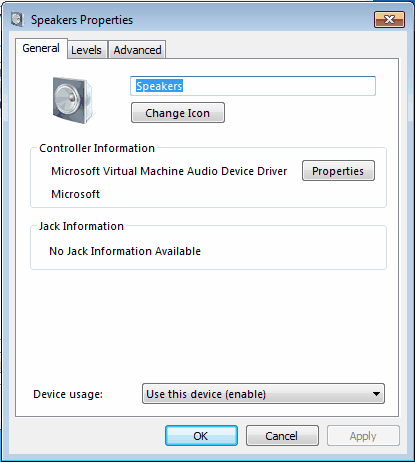
Make sure the "Device Usage" option at the bottom of the page is set for "Use
this device (enable)."
4. Select the "Levels" tab at the top of page.
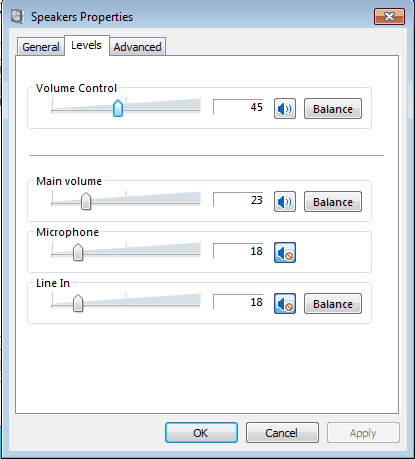
Make sure Volume Control and the Main Volume controls are about 50%. Make
sure the Line In input is muted, otherwise it may cause an echo. When you have
completed all the steps, press OK twice to exit back to the Audio Delay program.
5. We will now adjust the
playback and speaker volume for the Audio Delay. This should be done after you
configure the Audio Delay and have pressed the Play Button.
Click on the "Speaker" icon in the Task bar. This will display the Windows
Volume control.
Double on the "Mixer" text at the bottom of the volume control. This will
bring up the Volume Mixer for the Speakers.
|

|
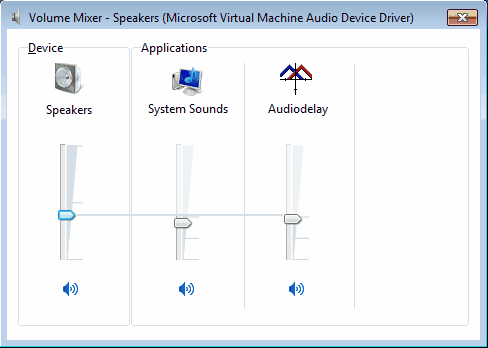
Adjust the Audio Delay and Speaker volume to get a comfortable listening
level. On some computers, you may need to turn up the system sound level as well
as the Audio Delay volume.
|