|
COMPASS For
Windows |
|
|
|
Getting COMPASS
|
|
|
|
Download/Install Issues
|
|
|
|
Registration
Information |
|
|
|
Auxiliary Tools/Information |
|
|
|
Tutorials - (New) |
|
|
| Links |
|
|
|
Documents/White Papers |
|
|
|
COMPASS For DOS |
|
|
|
MISC. |
|
|
|
|
|
|
|
|
|
|
Adding Annotations |
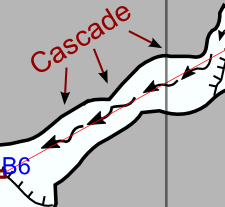
| X. Adding Annotations.
Annotations usually consist of written descriptions of a certain parts of the
cave. They are typically associated with a survey station or a
particular area of the passage. The descriptions are usually taken from
the sketch map, although they may also come from notes in survey data.
The image to the right shows a typical annotation taken from
the sketch map. In this section, we look at how to enter annotations into our
map. |
 |
| A. Annotation Layer. To enter notes,
we are going to create an Annotation Layer. We going to place it in the
w2d_Detail_sym layer. This layer is used because items in the layer will
not be warped during the Compass Morph/Merge (round-tripping) process. |
| Begin by selecting the "w2d_Detail_sym"
layer. Make sure the layer is visible,
unlocked and selected (highlighted.) |

|
|
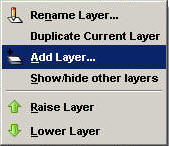
We could just put the
height items in the w2d_Detail_sym layer, but to keep things well organized, we are going to add
a new sub layer for the annotations. Right click on the w2d_Detail_sym layer and
select the "Add Layer" option. |
|
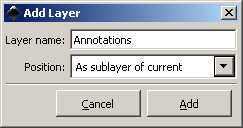
| This will bring up the "Add Layer" dialog.
Set the Layer Name to "Annotations" and set the Position option to "As sub-layer of current." Press the "Add" button when you are finished.
This will add a new layer name "Heights" to the layer list. The new
layer will be under the "w2d_Detail_sym" layer. |
|
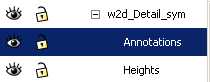
| Finally, make sure the
annotation layer is visible, unlocked and selected (highlighted.) |
 |
| A. Default Font. Now we need to choose a default font and
font size. Select the "Text -> Text and Font" option from the menu bar. |
|
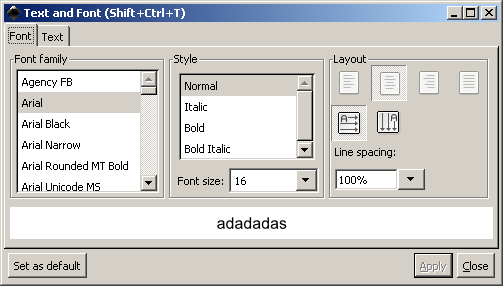 |
| Choose a Font Family and a Font Size. I'm using a 9-point
Arial font. You also want to choose the "Align Left" option. Now
press "Set as Default" button |
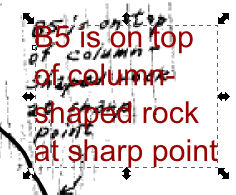
| B. Enter Text. Now click on the map where you
want to place your annotations. A small vertical cursor will appear. Just type
the text you want directly into the map. In the example to the right,
I have typed the annotations right over their position in the sketch map. When
we finish the map, the sketch map will be hidden and the annotations will
appear on top of our gray background. |
 |
|
If you are not happy with the font face or size, you can change value
using the options on the top tool bar. |
|
 |
|
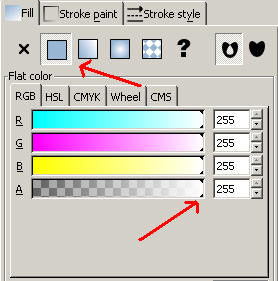
I'm also coloring my annotations a muted red color so make them
stand out. To
set the font color, choose the "Object -> Fill and Stroke" option
from the menu bar. Next, select the "Fill Page." Finally, make sure the
"Flat Color" button is down and adjust the sliders to get the color you
want. In the case of my muted red, I set the Red value to 128, the Blue
and Green to 0, and the Alpha to 255. |
 |
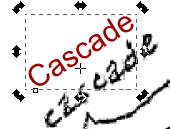
| C. Angled Text. It is often useful have the
annotations
follow the contour the cave passage. To do this you will want to rotate
the text so it runs along the edge of the passage. |
| To do this just enter the text normally then
switch to the selection tool. |
 |
| Next click once then twice in slow
succession. The second click will cause rotation handles to
appear at the corners of the ext box. Just drag these "handles"
and the text will rotate. |
|
| Inkscape has many
other special effects that can be used on text. You can make the
text curve to follow the irregular shape of a passage. Refer to
the Inkscape help files for more information. |
|
|
|
|
|
|
|
| Sponsored Links |
|
|
| Sponsored Links |
|
|
| Sponsored
Links |
|
|
| Sponsored Links |
|
|
|

