|
COMPASS For
Windows |
|
|
|
Getting COMPASS
|
|
|
|
Download/Install Issues
|
|
|
|
Registration
Information |
|
|
|
Auxiliary Tools/Information |
|
|
|
Tutorials - (New) |
|
|
| Links |
|
|
|
Documents/White Papers |
|
|
|
COMPASS For DOS |
|
|
|
MISC. |
|
|
|
|
|
|
|
|
|
|
Importing
Sketch-maps. |
| IV. Importing Sketch-maps.
Most people derive the passage walls
in their finished maps by tracing the scanned versions of the
sketch-maps for the cave. This section will show you how to trace
sketch-maps in Inkscape. (If you don't have sketch-maps, you can use the
passage-wall information from the plot file to trace the passage walls.
Click here for more information.) To trace a sketch-map into Inkscape, you need a scanned
image of your sketch-map. It is also very useful to process the
sketch-map through the "Compass
Sketch-map Editor" before you trace it in Inkscape. |
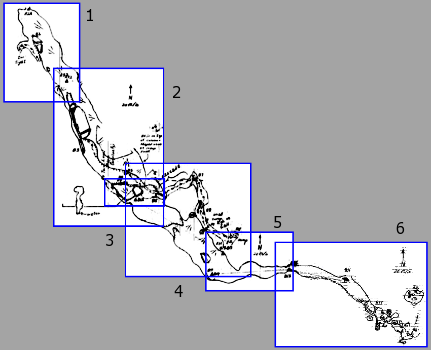
In this
tutorial, we will use a sketch-map of the B-Survey from Fulford Cave as
the example. The sketch image has been processed with the
Compass Sketch-map Editor
to combine and align six sketch-maps into a single image.
This makes it easier to trace because you can work with a
single image instead of six separate pieces. It is also more accurate
because the bitmap has been warped so that it perfectly matches the
survey data.
|
 |
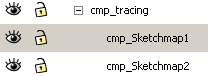
| A. Loading A Sketch-map. The first step in the process is to
load the sketch-map into Inkscape. Be sure that one of the "cmp_Sketchmap"
layers has been selected and enabled before you start. (You can use
either layer for your sketch maps and you can add more more layers if
you need them.) |
 |
To load a sketch map, go to the "File" menu and select the
"Import" option. This will allow you to open any common type of bitmap
image. |

|
| B. Preparing The Image. When the
image is loaded, it will appear in the middle of the Inkscape screen.
The first task will be to scale and position the image to match the
scale of the plot in Inkscape. You will probably want to zoom in a bit
so you can see survey stations and the shot lines. You can do this using
the magnifier tool in the bottom-right corner of the Inkscape Window. |
|
|
 |
| C. Scaling The Image.
The main goal now is to scale and position the sketch map image so
it matches the scale and position of the survey lines and station
locations in the SVG file that was exported from Compass.
|
| Start by making sure the
"Selection Tool" button is down on the left-hand tool bar.
|
 |
| Next, make sure the "cmp_Sketchmap"
layer where you loaded your sketch map is visible, unlocked and
selected. in the Layer List on the right. That will select the proper
layer. The final step is to select the
individual object in the layer. Right now we only have one sketch map
loaded, but in the future, we may have more than one, so the next step
is important. Just click on the sketch-map image in the main window to be sure it is selected. |
|
| This will cause the Image-Size control to appear on the
tool bar at the top of the window. You want to maintain the aspect ratio
of the image as we scale it, so press the "Lock" button between
the W and H boxes. |
 |
| This locks the two controls together so the aspect ratio
of Width to the Height is maintained constant no matter what size the
image is set to be. Now start changing the Width or Height of the
image. Both dimensions will change and the image's size will change along
with it. The goal is to adjust the sketch map so the stations and shot
lines in the sketch match of the line plot. You do this incrementally,
so the first time, just try to get it close. We will fine tune later. |
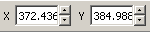
| D. Repositioning. As the size changes, you will
need to reposition the image. You can do this with the Image Position
controls on the top tool bar. The "X" control moves the image right and
left, and the "Y" control moves the image up and down. |
|
| You can also move the image by clicking on it and
dragging. (If you have any problems, make sure that the image and the
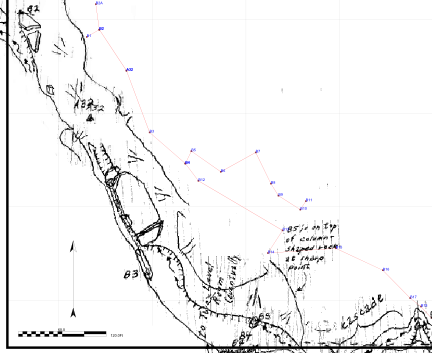
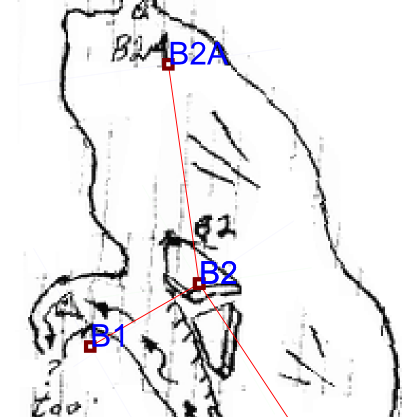
proper layer are selected.) E. Fine Tuning.
At this point, you are trying to
get all the survey stations in the sketch to exactly match the position
in plots. Since it is easy to over shoot in your adjustments, I
usually work on one end of the sketch and then on the other, making small
adjustments. As you do this, the errors will get smaller and smaller. If
you prepped the images using the Sketch-Map Editor, you should be able
to get all the stations right on target. The
example on the right shows the sketch map close to the final position,
but not quite there. The sketch needs to be moved slightly down and
to the right so the station markers at B1, B2 and B2A are align
perfectly the sketch map. |
|
|
To make the process easier, the closer you get having
things properly aligned, the more you want to zoom. |
|
| When you are satisfied with the position and the scaling, lock the
layer so you don't accidentally move it. |
 |
|
|
|
|
|
|
| Sponsored Links |
|
|
| Sponsored Links |
|
|
| Sponsored
Links |
|
|
| Sponsored Links |
|
|
|

