|
|
|
Adding Continuation
Passages |
| VIII. Continuation Passages. Passage that continue
past the point were the survey ends are usually depicted with dotted
lines. The next step in the process will be to add these kinds of
passages. |
Begin by opening the passage at the
appropriate point as described in the previous section. You can then drag the ends of the
passage and adjust the control points so the end point in the right
direction.
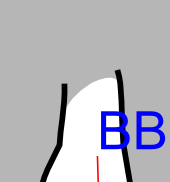
| We are now ready to begin drawing the
passage wall continuations. First, select the Bezier Tool from the tool
bar on the left. |
 |
|
 |
| Next, select the "Object -> Fill and Stroke" option
from the menu bar and select the "Stroke Style page. This will
allow us to adjust the line characteristics while we work. |
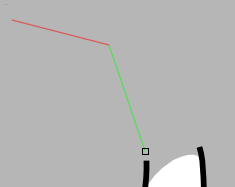
| We'll now begin drawing lines. Click just
off the end of the left passage and then move the mouse in the direction
the passage goes. This will cause a thin red line to follow the mouse
cursor. Click again, and the line will become fixed and turn green, and
a new red line will follow the cursor. Do this several times along the
course of the passage wall. When you have reached the end, right click
and a new black line will be drawn. If the line is too thick, use the
Stroke Style, width option to adjust it. |
|
| Do the same thing with the right side of
the passage. When you are done, you should have two passage wall lines
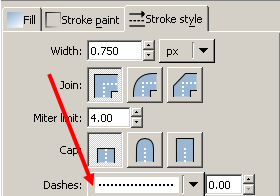
drawn. Now switch to the Node Tool and use the techniques you learned
earlier to adjust and smooth the passage wall lines. Finally, when you
are satisfied with the shape of the passages, select one of the lines
and press the Arrow button to the right of Dashes display. This will
show you a long list of dotted and dashed lines. When you select one,
your line will be redrawn with that pattern. Experiment with the
different options until you find something you like. |
|
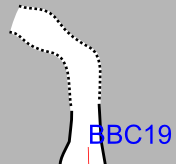
| At this point, the passage will extend
beyond the white mask area. To deal with this problem, simply go back
and select the mask layer and, use the Node Tool to expand the mask. You
can double click along the edge of the mask to add new nodes. You can
then drag these new nodes into position to fill the new area. Likewise,
you can use the Bezier control points to shape, smooth and adjust the
mask until it matches the newly added passage. |
|
|
|
|
|